Hello for one more time!
Some time ago I had written a post about how to use UITableView cells and make them work as a drop-down list. Anyone who had read that post might understood that when working with UITableViews you can do things more than the usual and common ones, and you can go as far as your imagination and the technology let you go. Indeed, when knowing how to work with UITableViews in a more advanced level, then you can create more flexible apps that make your users happier.
So, as you correctly guess, in this post I’m going to work again with the UITableView and to put it in just one, short sentence, I’m going to show you how to display and hide sections on the fly (in the previous post I showed how to display and hide rows of a section).
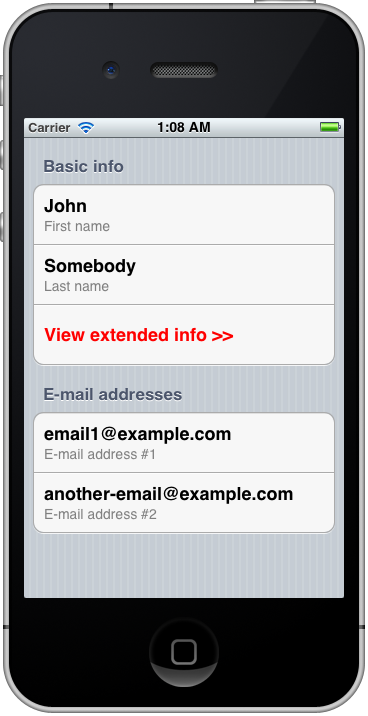
To make the point of this post clear, I’m going to use as an example a part of an hypothetic contacts app. I’m going to use a UITableView to display some contact info. This table view is going to have four (4) sections and the app will allow us to view either all or just the two of them. When viewing all of the sections, then (hypothetically again) we’re viewing the extended (detailed) info of the contact, whereas when viewing only two sections, then we’re viewing just the basic info. Here is what each section is going to have (contents per cell):
Section #1
- First name
- Last name
- Toggle state button (basic modeextended mode)
Section #2
- Phone number #1
- Phone number #2
Section #3
- Address
- Postal Code
Section #4
- E-mail address #1
- E-mail address #2
The third cell of the first section will be used as the toggle button that will enable us to switch from the basic info to the extended info and backwards.
When being in basic info mode, then we’ re going to have only the first and the last section visible, while the second and the third ones will be hidden. In extended mode all of the sections will be visible. That means that in basic mode we’ll have the name and e-mail info of the contact available, while the rest of the info will become visible/invisible, depending on our will. The initial state of the app will be in basic mode.
The big idea behind all this is a BOOL variable, a flag, which indicates whether all sections are visible or not. If that flag (named showAllSections) is YES (true), then all sections and all info will be available. If it’s set to NO (false), then only the first and the last sections (basic info) will be available. Initially, it’s value will be set to NO. Then, when we tap on the switch cell, the third cell of the first section, this flag will be set to YES and the table view will be updated. On a second tap, the flag will change it’s value again and the table view will be updated to hide the extra sections. This functionality will circulate while we tap on the cell to switch state.
Let’s go to the implementation. I’m using Xcode 4.3 and iOS Simulator 5.1.
You can either implement the project step by step as described below, or you can download it. See at the end of the post.
STEP 1 – Create the project
Launch the XCode and create a new Single View Application:
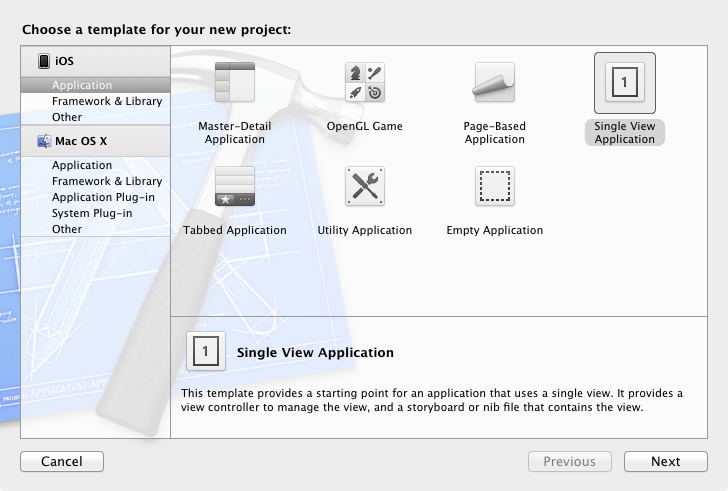
Next, set a name for the app. I named it UITableSectionsTestApp. You are always free to name the test projects whatever you like.

Finally, choose a directory to save the project and you are ready.
STEP 2 – Setup the interface
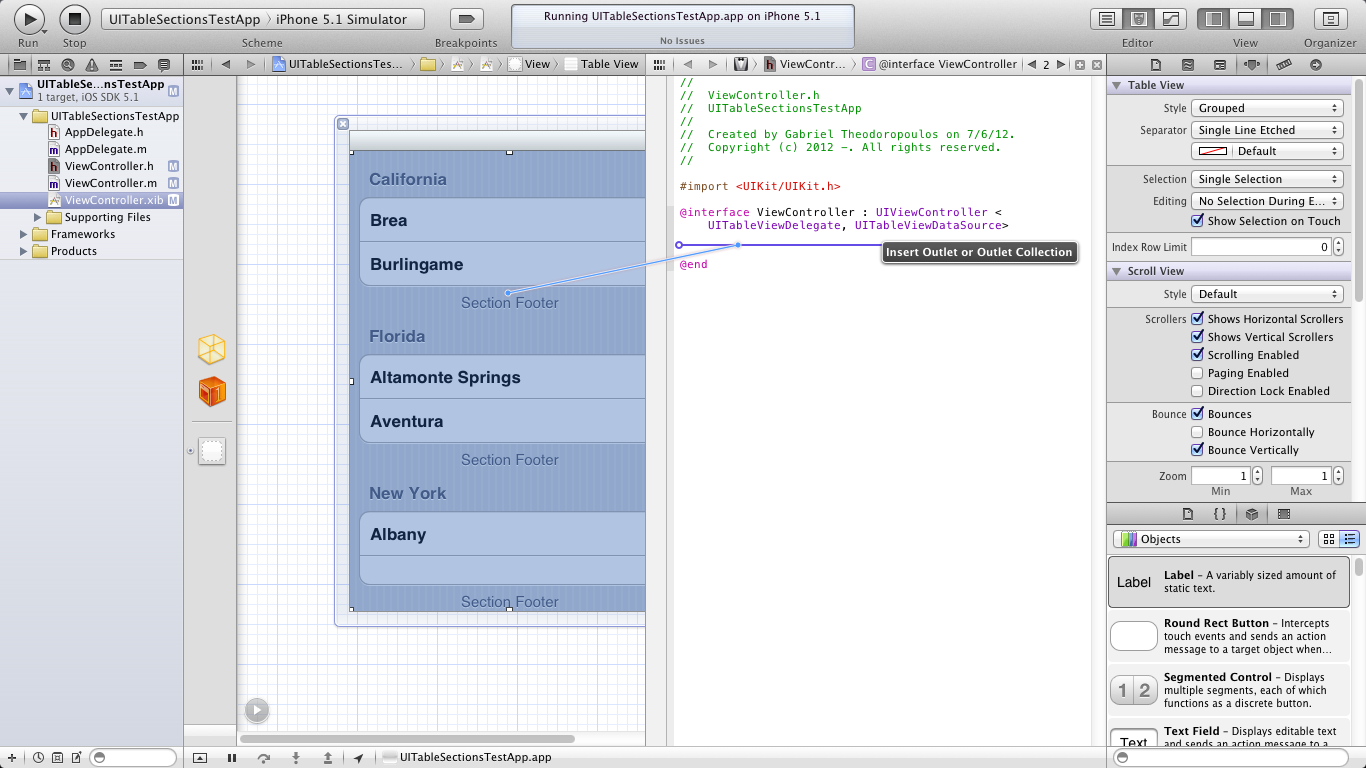
In this step we’ re going to setup the interface of the app. The interface is going to be really simple. Click on the ViewController.xib file to bring the Interface Builder in front. Add a table view inside the view and you are ready.
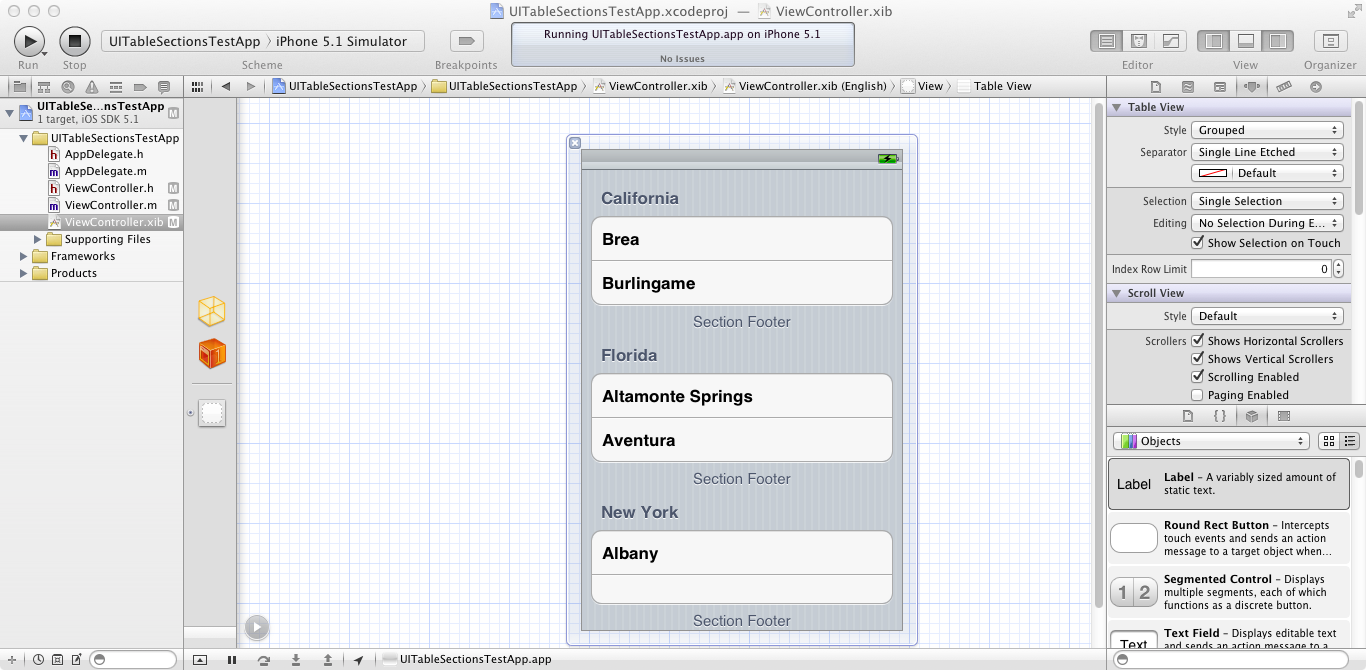
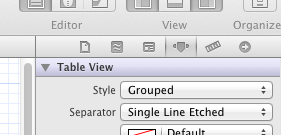
Because we talk about table view sections in this example, it would be a good idea not to use the plain style for the table, but the Grouped option, as you can see in the next image:
STEP 3 – Create and connect the Outlet
While being in the Interface Builder, click on the button at the top right corner of the XCode that shows the assistant editor.
![]()
The ViewController.h file will be exposed there (pick it by yourself if you see some file else). Keep the Ctrl button on the keyboard pressed and drag and drop the table view from the Interface Builder into the assistant editor to create an outlet:
Specify a name for the table view. I named mine table.
When using the above method, the Xcode automatically synthesizes the outlet, it releases it and makes the connection. If you don’t want to follow that way, you have to manually set the outlet in the ViewController.h file and then synthesize and release it in the ViewController.m file. Finally, you have to connect the outlet to the table view inside the Interface Builder. No need to get into more details, as it’s out of the scope of this post.
STEP 4 – Declare all required objects and properties for the project
Generally, it’s a good practise to keep the data that will be displayed into a table view stored in arrays (NSMutableArray). By that way you can just use the values of the indexPath (row, section) provided by the API and just in a few lines of code to display the correct data each time. Otherwise, you need to check the current section/row and depending on these values to display your data conditionally, which ends up to be a really big mess.
In this example, I’m going to use arrays to store the data that will be displayed into the table view. Even more, I’ll init the cells using the subtitle style, so under each cell content there will be a detailed text too. So, apart from the array I’m going to use for the main data of the table view, I’m going to use one more to store the texts of the detailed texts of the cells.
For simplicity, we’ll declare all of our objects and any other properties into the ViewController.h file, even though that kind of stuff should be declared into the private section of the interface.
Go and open the ViewController.h file. At first, we need to declare two delegates for the table view, so modify the interface header accordingly and as you see in the code below:
[objc]
@interface ViewController : UIViewController
[/objc]
At this time you should have in your file only the table view outlet, as shown below:
[objc]
@interface ViewController : UIViewController
@property (retain, nonatomic) IBOutlet UITableView *table;
@end
[/objc]
We’re going to add the two arrays I mentioned earlier. Under the @property… add those two lines:
[objc]
@property (nonatomic, retain) NSMutableArray *tableData;
@property (nonatomic, retain) NSMutableArray *subtitleData;
[/objc]
The first array named tableData is the one that will store everything we want to be displayed. The second array, named subtitleData, is the array which will keep the texts of the detailed text part of the cell.
Earlier, we said that the key to the whole idea is to use a BOOL flag which indicates whether all sections should be visible or not. So, it’s time to declare it too.
[objc]
@property (nonatomic) BOOL showAllSections;
[/objc]
Fine until now. Your .h file should be looking like this:
[objc]
#import <UIKit/UIKit.h>
@interface ViewController : UIViewController
@property (retain, nonatomic) IBOutlet UITableView *table;
@property (nonatomic, retain) NSMutableArray *tableData;
@property (nonatomic, retain) NSMutableArray *subtitleData;
@property (nonatomic) BOOL showAllSections;
@end
[/objc]
STEP 5 – Synthesize and Release
The next step is to synthesize and release the objects and the flag we previously declared. So, open the ViewController.m file and synthesize under the @implementation ViewController header:
[objc]
@implementation ViewController
@synthesize table;
@synthesize tableData;
@synthesize subtitleData;
@synthesize showAllSections;
[/objc]
Don’ t forget to release as well:
[objc]
– (void)dealloc {
[table release];
[tableData release];
[subtitleData release];
[super dealloc];
}
[/objc]
Now it’s time for the real work.
STEP 6 – Implementation
Before doing anything else, we need to complete four tasks:
- Init the flag.
- Init the arrays.
- Fill the arrays with contents.
- Set the table view’s delegate and reload the table view to show the correct data.
All these stuff will get implemented inside the viewDidLoad method. Let’s begin.
At first, we set the showAllSections property to NO.
[objc]
// Initially we don’t want all sections to be visible,
// so we set the showAllSections to NO.
showAllSections = NO;
[/objc]
Next, we must init the arrays and fill them with contents. Because we have four sections and each section has different number of rows, we’ll add the contents of the arrays as other, new arrays (and finally will have two-dimensional arrays). Here it is with the sample data that will be displayed:
[objc]
// Init the tableData array, which will contain all the data shown in our table.
tableData = [[NSMutableArray alloc] init];
// Add the contents of the first section as a secondary array.
[tableData addObject:[NSMutableArray arrayWithObjects:@"John", @"Somebody", @"View extended info >>", nil]];
// Add the contents of the last section as a secondary array.
[tableData addObject:[NSMutableArray arrayWithObjects:@"email1@example.com", @"another-email@example.com", nil]];
// Init the subtitleData array and prepare its contents, in accordance to the tableData array.
subtitleData = [[NSMutableArray alloc] init];
// Add the detailed text data for the first section.
[subtitleData addObject:[NSMutableArray arrayWithObjects:@"First name", @"Last name", @"", nil]];
// Add the detailed text data for the last section.
[subtitleData addObject:[NSMutableArray arrayWithObjects:@"E-mail address #1", @"E-mail address #2", nil]];
[/objc]
Note that the “View extended info >>” is the text of the cell that will work as a toggle button. This text will change on the fly later.
Finally, set the table’s delegate and datasource and reload the table view.
[objc]
// Set the table’s delegate.
[table setDelegate:self];
[table setDataSource:self];
// Reload the table.
[table reloadData];
[/objc]
The viewDidLoad method is now complete. Let’s go to implement the table view delegate methods.
First, set the number of sections of the table view:
[objc]
// Customize the number of sections in the table view.
– (NSInteger)numberOfSectionsInTableView:(UITableView *)tableView {
// If the showAllSections is NO, then we want only two sections.
// Otherwise, we want our table to have four sections.
if (!showAllSections) {
return 2;
}
else{
return 4;
}
}
[/objc]
The comments explain everything. No need to tell anything more. Next we must set the number of rows in each section. Here is how many rows each section is going to have:
- Section #1: 3 rows (first name, last name, toggle state cell).
- Section #2: 2 rows (phone number #1, phone number #2).
- Section #3: 2 rows (address, postal code).
- Section #4: 2 rows (2 e-mail addresses).
[objc]
// Customize the number of rows in the table view.
– (NSInteger)tableView:(UITableView *)tableView numberOfRowsInSection:(NSInteger)section{
if (section == 0) {
return 3;
}
else{
return 2;
}
}
[/objc]
Now we have the number of sections and the rows per section is good to add some titles to the sections:
[objc]
// Add header titles in sections.
– (NSString *)tableView:(UITableView *)tableView titleForHeaderInSection:(NSInteger)section{
NSString *headerTitle = @"";
if (section == 0) {
headerTitle = @"Basic info";
}
else{
if (showAllSections) {
switch (section) {
case 1:
headerTitle = @"Phone numbers";
break;
case 2:
headerTitle = @"Addresses";
break;
case 3:
headerTitle = @"E-mail addresses";
default:
break;
} // switch
} // if
else{
headerTitle = @"E-mail addresses";
} // else
} // else
return headerTitle;
}
[/objc]
We must also set the height of the rows:
[objc]
// Set the row height.
– (CGFloat)tableView:(UITableView *)tableView heightForRowAtIndexPath:(NSIndexPath *)indexPath{
return 60.0;
}
[/objc]
Time to display our data:
[objc]
// Customize the appearance of table view cells.
– (UITableViewCell *)tableView:(UITableView *)tableView cellForRowAtIndexPath:(NSIndexPath *)indexPath {
static NSString *CellIdentifier = @"Cell";
UITableViewCell *cell = [tableView dequeueReusableCellWithIdentifier: CellIdentifier];
if (cell == nil) {
cell = [[[UITableViewCell alloc] initWithStyle:UITableViewCellStyleSubtitle reuseIdentifier:CellIdentifier] autorelease];
}
// We don’t want our cells to have any selection style.
[cell setSelectionStyle:UITableViewCellSelectionStyleNone];
NSString *dataToShow = [[tableData objectAtIndex:[indexPath section]] objectAtIndex:[indexPath row]];
NSString *detailText = [[subtitleData objectAtIndex:[indexPath section]] objectAtIndex:[indexPath row]];
[[cell textLabel] setText:dataToShow];
[[cell textLabel] setTextColor:[UIColor blackColor]];
[[cell detailTextLabel] setText:detailText];
// Format the cell that work as our toggle button.
if ([indexPath section] == 0 && [indexPath row] == 2) {
[[cell textLabel] setTextColor:[UIColor redColor]];
// The "View extended info" cell should have different selection style.
[cell setSelectionStyle:UITableViewCellSelectionStyleBlue];
}
return cell;
}
[/objc]
Notice the following:
- When initializing the cell, we use the
UITableViewCellStyleSubtitleas the parameter for theinitWithStyleoption. - We don’ t want the cells to have any selection style, so we set it to None (
[cell setSelectionStyle:UITableViewCellSelectionStyleNone];). For the cell that will be used as the toggle state switch we specify it explicitly. - We use the
[cell textLabel]and[cell detailedTextLabel]methods to access each cell’s main text and its detailed text. - We explicitly set the color of each cell to black to avoid wrong coloring when scrolling the table view up or down. For the cell that will be used as the toggle state switch, we set another color (red color) to make it look different.
- Finally and most important, we use the
indexPathsection and row to access the correct data in our arrays. The data values for each cell are stored in two NSString variables.
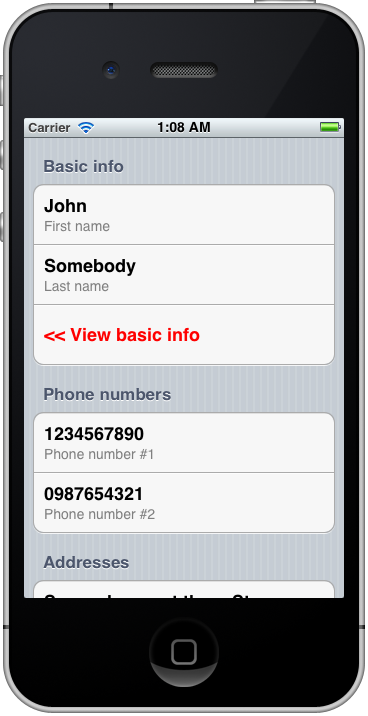
If you run the app at this point, you will see in the Simulator only the two sections visible, just exactly what we wanted, but there will be no functionality when tapping on the “View extended info >>” cell. That’ s what remains to be done:
[objc]
– (void)tableView:(UITableView *)tableView didSelectRowAtIndexPath:(NSIndexPath *)indexPath{
// At first, we need to make sure that only the "View extended info" cell was tapped.
if ([indexPath section] == 0 && [indexPath row] == 2) {
// Now, depending on the showAllSections flag either we’ll add two more
// section along with their data into the table, or we’ll remove them.
// Let’s check.
if (!showAllSections) {
// This is the case where only two sections are currently visible
// and we should add two more.
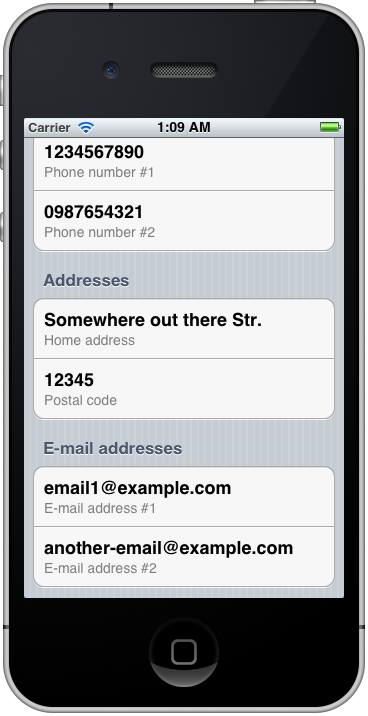
[tableData insertObject:[NSArray arrayWithObjects:@"1234567890", @"0987654321", nil] atIndex:1];
[subtitleData insertObject:[NSArray arrayWithObjects:@"Phone number #1", @"Phone number #2", nil] atIndex:1];
[tableData insertObject:[NSArray arrayWithObjects:@"Somewhere out there Str.", @"12345", nil] atIndex:2];
[subtitleData insertObject:[NSArray arrayWithObjects:@"Home address", @"Postal code", nil] atIndex:2];
// Change the text of the "View extended info" to "View basic info".
[[tableData objectAtIndex:0] replaceObjectAtIndex:2 withObject:@"<< View basic info"]; }
else{
// Remove the two middle sections.
[tableData removeObjectAtIndex:2];
[tableData removeObjectAtIndex:1];
[subtitleData removeObjectAtIndex:2];
[subtitleData removeObjectAtIndex:1];
// Change the text of the "View extended info" to "View basic info".
[[tableData objectAtIndex:0] replaceObjectAtIndex:2 withObject:@"View extended info >>"];
}
// Change the state of the flag.
showAllSections = !showAllSections;
// Reload the table.
[table reloadData];
}
}
[/objc]
As you can see, the first thing we do is to check what cell was tapped. We ignore any other cell than the one on the first section, third row. Next, we check the state of the showAllSections flag. If currently is set to NO, we “inject” the data of the other two sections we want to display into our arrays. We also change the “View extended info >>” text to “

Download the project here.
This tutorial was transferred as it was originally written in my blog, therefore some techniques, tools or SDKs may have changed since then.